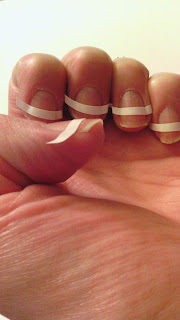
This is going to be an over-packed post. It's my Halloween kick-off, a brief tutorial and product review. Let's start with a tutorial. I'm going to test out Nailene Perfect tips French Polish Guides.
I picked these up at Walmart for about $3 for 96 guides. Basic application for a
french manicure is as follows:
1) Apply the guide across the curve of the nail to separate the areas
2) Apply nail color to one area of the nail. Let dry. Peel off the guide.
3) Apply nail color to entire nail
4) Apply top coat (optional)
However- I'm not doing your average french manicure... so this is how it's going to work.
1) Apply Nailaid growth clear base coat- let dry thoroughly
2)Apply Nailene nail guide
 |
| (As you can see, you don't have to follow closely to the nail tip, I
moved the guide closer to my cuticle for a different effect.) |
3)Apply first nail polish (if you're doing 2 colors- if not skip to step #4) let dry and then carefully remove the guide. I did notice that some of my base coat did peel off with the guide, but my main color ( Funky Fingers # 5287 Riot) stayed put.

4)Add tip color (Sinful Colors #103 Black on Black)
5) Lastly, finish with OTD top coat, clean up your edges and you're done!
All in all, the manicure was a success : ) The guides made the curvatures even and uniform. The base coat peeling is a little frustrating, but not a big deal. The second color and top coat cover any flaws. If you're going to try this - just give yourself lots of drying time. I will definitely use these guides again, they take the guess work out of a french tip manicure and they are real simple to use.
* I did add a stamped image of a spider web and a spider to separate the black and purple. Stamping will be another tutorial *


